10 Creative DIY Bookmark Ideas You Can Make at Home
Do you love to read but always find yourself losing your page? Or maybe you’re looking for a fun and unique gift idea for a fellow bookworm? Look no further than DIY bookmarks! Making your own bookmarks is not only practical, but it can also be a fun and creative activity that allows you to express your personal style. Here are 10 creative DIY bookmark ideas that you can make at home.
Photo Bookmark
A photo bookmark is a personalized and meaningful way to mark your page in a book. It is a great way to showcase your favorite memories, whether it’s a photo of yourself, your loved ones, or a favorite place. Here’s a step-by-step guide on how to make your own photo bookmark:
Materials
- A printed photo
- Cardstock or laminated paper
- Scissors
- Glue or double-sided tape
- Hole punch
- Ribbon or string
Instructions
- Choose a photo that you want to use for your bookmark. Make sure that the photo is printed in the correct size for your bookmark, which is typically 2 inches by 6 inches.
- Cut a piece of cardstock or laminated paper to the same size as your photo. This will serve as the base for your bookmark.
- Apply glue or double-sided tape to the back of your photo, then carefully attach it to the cardstock or laminated paper. Make sure to smooth out any wrinkles or air bubbles.
- Once your photo is attached, use a hole punch to create a hole at the top of the bookmark.
- Thread a ribbon or string through the hole, and tie it in a knot or bow.
- If you want to make your bookmark more durable, you can laminate it by covering it with clear contact paper.
- Once your bookmark is complete, use it to mark your page in your favorite book.
Tips
- You can use a corner punch to give your bookmark a rounded edge for a more polished look.
- To make your bookmark more durable, consider printing your photo on cardstock or photo paper.
- Experiment with different ribbon or string colors to match your photo or personal style.
With these simple steps, you can create a unique and personalized photo bookmark that will make reading even more enjoyable. Plus, it makes a great gift for the bookworm in your life!
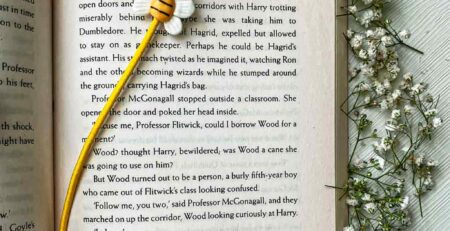
Tassel Bookmark
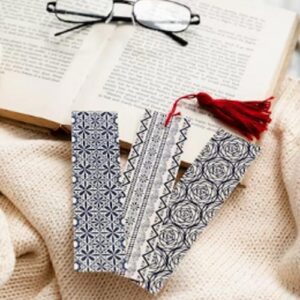 A tassel bookmark is a classic and elegant way to mark your page in a book. It adds a touch of style and sophistication to your reading experience. Here’s a step-by-step guide on how to make your own tassel bookmark:
Materials
- Cardstock or heavy paper
- Scissors
- Hole punch
- Embroidery floss or thin ribbon
- Beads (optional)
Instructions
- Cut a strip of cardstock or heavy paper to the desired size of your bookmark. The typical size is 2 inches by 6 inches.
- Punch a hole at the top center of the bookmark.
- Cut a piece of embroidery floss or thin ribbon that is about 8 inches long.
- Fold the embroidery floss or ribbon in half and thread it through the hole in the bookmark. Pull the looped end through the hole until it is even with the other end.
- Take another piece of embroidery floss or ribbon and wrap it around the folded end of the first piece several times to create the tassel. Tie a knot around the wrapped threads near the top of the tassel.
- Trim the bottom of the tassel to your desired length.
- (Optional) To add some decorative flair, thread a bead or charm onto the embroidery floss or ribbon before tying the knot.
Your tassel bookmark is now complete! Use it to mark your page in your favorite book.
Tips
- Experiment with different colors of embroidery floss or ribbon to match your personal style.
- Add multiple tassels to your bookmark for a more dramatic effect.
- Use different types of beads or charms to add some personality to your bookmark.
With just a few simple steps, you can create a beautiful and functional tassel bookmark that will elevate your reading experience. It’s also a great gift idea for any book lover!
Paint Swatch Bookmark
A paint swatch bookmark is a fun and colorful way to mark your page in a book. It’s also an eco-friendly option since it uses materials that would otherwise be thrown away. Here’s a step-by-step guide on how to make your own paint swatch bookmark:
Materials
- Paint swatches in the colors of your choice
- Scissors
- Hole punch
- Ribbon or string
Instructions
- Choose paint swatches in the colors that you want to use for your bookmark. You can typically find these at home improvement stores or paint supply stores.
- Cut the paint swatches into strips that are approximately 2 inches wide and 6 inches long.
- Punch a hole at the top center of each paint swatch strip.
- Cut a piece of ribbon or string that is about 8 inches long.
- Thread the ribbon or string through the hole in one of the paint swatch strips. Tie a knot at the end of the ribbon or string to secure it in place.
- Repeat step 5 with the other paint swatch strips, stacking them on top of each other and tying a knot at the end of the ribbon or string to secure them in place.
- Trim the ends of the ribbon or string to your desired length.
Your paint swatch bookmark is now complete! Use it to mark your page in your favorite book.
Tips
- Experiment with different color combinations to create a unique and personalized bookmark.
- Use a decorative edge punch to add some flair to the edges of your paint swatch strips.
- Add a tassel to your bookmark for an extra touch of style.
With just a few simple steps, you can create a fun and colorful paint swatch bookmark that will add some personality to your reading experience. It’s also a great way to repurpose materials that would otherwise go to waste.
Magnetic Bookmark
 A magnetic bookmark is a convenient and easy way to mark your page in a book without the risk of falling out. It’s also a great option for those who don’t want to damage their book pages with traditional bookmarks. Here’s a step-by-step guide on how to make your own magnetic bookmark:
Materials
- Cardstock or heavy paper
- Scissors
- Magnetic tape or adhesive magnets
- Decorative paper or washi tape (optional)
- Stickers or other embellishments (optional)
Instructions
- Cut a strip of cardstock or heavy paper to the desired size of your bookmark. The typical size is 2 inches by 6 inches.
- Cut a piece of magnetic tape or adhesive magnet to the same size as your bookmark.
- Peel off the backing from the magnetic tape or adhesive magnet and attach it to the back of the bookmark. Make sure it is centered and evenly attached.
- (Optional) To add some decorative flair, cover the front of the bookmark with decorative paper or washi tape. You can also add stickers or other embellishments.
Your magnetic bookmark is now complete! Use it to mark your page in your favorite book by placing the two magnetic ends on either side of the page you want to mark.
Tips
- Experiment with different patterns and colors of decorative paper or washi tape to match your personal style.
- Use different shapes for your bookmark, such as hearts or stars, for a fun touch.
- Make several magnetic bookmarks in different designs to use for different books.
With just a few simple steps, you can create a convenient and stylish magnetic bookmark that will keep your page marked securely. It’s also a great gift idea for any book lover!
Fabric Bookmark
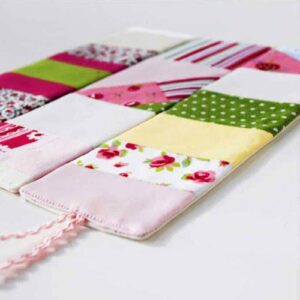 A fabric bookmark is a soft and colorful way to mark your page in a book. It’s also a great option for those who enjoy sewing and want to use up some of their fabric scraps. Here’s a step-by-step guide on how to make your own fabric bookmark:
Materials
- Fabric scraps (at least 6 inches wide and 8 inches long)
- Scissors or rotary cutter
- Iron
- Sewing machine or needle and thread
- Fray check (optional)
Instructions
- Cut a piece of fabric to the desired size of your bookmark. The typical size is 2 inches by 6 inches.
- Fold the fabric in half lengthwise with the right sides facing each other.
- Using a sewing machine or needle and thread, sew a straight stitch along the open edges of the bookmark, leaving a 1/4 inch seam allowance. Be sure to backstitch at the beginning and end of the seam.
- Turn the bookmark right side out and press it flat with an iron.
- Fold the top of the bookmark down about 1 inch and press it flat with an iron.
- Using a sewing machine or needle and thread, sew a straight stitch along the bottom of the folded fabric, about 1/4 inch from the edge. Be sure to backstitch at the beginning and end of the seam.
Your fabric bookmark is now complete! Use it to mark your page in your favorite book.
Tips
- Experiment with different fabrics, patterns, and colors to match your personal style.
- Use decorative stitches or embroidery to add a unique touch to your bookmark.
- Apply fray check to the edges of the fabric to prevent fraying.
With just a few simple steps, you can create a soft and stylish fabric bookmark that will add some color to your reading experience. It’s also a great way to use up some of your fabric scraps and is a perfect gift idea for any book lover who enjoys sewing.
Washi Tape Bookmark
A washi tape bookmark is a fun and colorful way to mark your page in a book. It’s also a great option for those who enjoy crafting and want to use up some of their washi tape collection. Here’s a step-by-step guide on how to make your own washi tape bookmark:
Materials
- Cardstock or heavy paper
- Scissors
- Washi tape in various colors and designs
- Hole punch
- Ribbon or twine
Instructions
- Cut a strip of cardstock or heavy paper to the desired size of your bookmark. The typical size is 2 inches by 6 inches.
- Choose a few different colors and designs of washi tape to decorate your bookmark.
- Starting at one end of the bookmark, apply the first piece of washi tape horizontally, slightly overlapping the edge of the bookmark. Continue applying pieces of tape in different colors and designs until the entire front of the bookmark is covered.
- (Optional) Flip the bookmark over and repeat the process on the back to create a double-sided bookmark.
- Use a hole punch to create a hole at the top of the bookmark.
- Cut a length of ribbon or twine and thread it through the hole in the bookmark, tying a knot at the end.
Your washi tape bookmark is now complete! Use it to mark your page in your favorite book.
Tips
- Experiment with different patterns and colors of washi tape to match your personal style.
- Use scissors or a craft knife to create interesting shapes and designs with your washi tape.
- Create multiple bookmarks using different combinations of washi tape to keep things interesting.
With just a few simple steps and some creativity, you can create a fun and colorful washi tape bookmark that will add a personal touch to your reading experience. It’s also a great way to use up some of your washi tape collection and is a perfect gift idea for any book lover who enjoys crafting.
Leather Bookmark
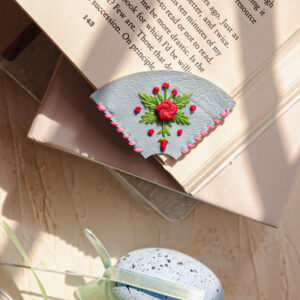 A leather bookmark is a classic and durable way to mark your page in a book. It’s also a great option for those who enjoy working with leather and want to create a personalized bookmark.Here’s a step-by-step guide on how to make your own leather bookmark:
Materials
- Leather scrap (at least 2 inches by 7 inches)
- Scissors or rotary cutter
- Ruler or straight edge
- Hole punch
- Rivets or eyelets (optional)
- Leather stamp or paint (optional)
Instructions
- Cut a strip of leather to the desired size of your bookmark. The typical size is 2 inches by 7 inches.
- Use a ruler or straight edge to mark a line 1/2 inch from the top of the bookmark. This will be the line where you punch a hole for the ribbon or twine.
- Use a hole punch to create a hole at the top of the bookmark, where you marked the line.
- (Optional) If you want to add some decorative elements to your bookmark, use a leather stamp or paint to add designs or lettering.
- (Optional) If you want to add some extra durability to your bookmark, use rivets or eyelets to reinforce the hole at the top of the bookmark.
- Cut a length of ribbon or twine and thread it through the hole in the bookmark, tying a knot at the end.
Your leather bookmark is now complete! Use it to mark your page in your favorite book.
Tips
- Experiment with different colors and types of leather to create unique bookmarks.
- Use a leather conditioner to keep your bookmark soft and supple.
- Use a leather punch to create additional holes or designs on your bookmark.
With just a few simple steps and some basic leatherworking tools, you can create a classic and durable leather bookmark that will last for years. It’s also a great way to personalize your reading experience and is a perfect gift idea for any book lover who appreciates handmade items.
Button Bookmark
A button bookmark is a simple and charming way to mark your page in a book. It’s also a great option for those who enjoy sewing and want to create a personalized bookmark. Here’s a step-by-step guide on how to make your own button bookmark:
Materials
- Fabric scraps (at least 2 inches by 7 inches)
- Button
- Needle and thread
- Ribbon or twine
Instructions
- Cut a strip of fabric to the desired size of your bookmark. The typical size is 2 inches by 7 inches.
- Fold the fabric in half, right sides together, so that it measures 2 inches by 3.5 inches. Use a needle and thread to sew the two short sides together, leaving one long side open.
- Turn the fabric right side out, using a pencil or chopstick to push out the corners.
- (Optional) Iron the bookmark flat to create a crisp edge.
- Fold the open edge of the bookmark down approximately 1/2 inch.
- Sew a button onto the folded edge of the bookmark, using a needle and thread. Make sure the button is positioned so that it will fit through the hole at the top of the bookmark.
- Use a hole punch to create a hole at the top of the bookmark.
- Cut a length of ribbon or twine and thread it through the hole in the bookmark, tying a knot at the end.
Your button bookmark is now complete! Use it to mark your page in your favorite book.
Tips
- Experiment with different types of buttons and fabrics to create unique bookmarks.
- Use embroidery thread to add some extra color and texture to your bookmark.
- Use a fray check or zigzag stitch along the edges of the fabric to prevent fraying.
With just a few simple steps and some basic sewing tools, you can create a charming and functional button bookmark that will add a personal touch to your reading experience. It’s also a great way to use up some of your fabric scraps and is a perfect gift idea for any book lover who enjoys handmade items.
Ribbon Bookmark
 A ribbon bookmark is a simple and elegant way to mark your page in a book. It’s also a great option for those who want a bookmark that is quick and easy to make. Here’s a step-by-step guide on how to make your own ribbon bookmark:
Materials
- Ribbon (at least 12 inches long)
- Scissors
- Fray check (optional)
Instructions
- Cut a length of ribbon to approximately 12 inches long.
- (Optional) Use fray check along the cut edges of the ribbon to prevent fraying.
- Fold the ribbon in half, making sure the cut edges are aligned.
- Tie a knot at the top of the ribbon, leaving a loop at the top that is approximately 2 inches long.
- Trim the ends of the ribbon at an angle to create a finished look.
Your ribbon bookmark is now complete! Use it to mark your page in your favorite book.
Tips
- Experiment with different types and colors of ribbon to create unique bookmarks.
- Use a lighter to singe the edges of the ribbon instead of using fray check.
- Use a bead or charm at the end of the ribbon for some extra flair.
With just a few simple steps and a length of ribbon, you can create a stylish and functional bookmark that is perfect for any book lover. It’s also a great way to add a pop of color or texture to your reading experience and is a perfect gift idea for anyone who enjoys reading.
Pom Pom Bookmark
A pom pom bookmark is a fun and colorful way to mark your page in a book. It’s also a great option for those who enjoy crafting and want to create a personalized bookmark. Here’s a step-by-step guide on how to make your own pom pom bookmark:
Materials
- Yarn in your desired color(s)
- Scissors
- Cardboard or pom pom maker
- Ribbon or twine
Instructions
- Cut a piece of cardboard into a rectangle shape that is approximately 2 inches by 3 inches. You can also use a pom pom maker if you have one.
- Wrap the yarn around the cardboard or pom pom maker, making sure to wrap it tightly and evenly.
- Cut a piece of yarn that is approximately 6 inches long.
- Slide the piece of yarn between the cardboard or pom pom maker and tie it tightly around the wrapped yarn.
- Slide the wrapped yarn off of the cardboard or pom pom maker and cut the loops on both sides of the tied yarn.
- Trim the pom pom to create an even and fluffy shape.
- Use a piece of ribbon or twine to tie a knot around the middle of the pom pom, leaving a loop at the top that is approximately 2 inches long.
- Trim the ends of the ribbon or twine at an angle to create a finished look.
Your pom pom bookmark is now complete! Use it to mark your page in your favorite book.
Tips
- Experiment with different colors and sizes of yarn to create unique bookmarks.
- Use a fork or small pom pom maker to create mini pom poms for a different look.
- Add some extra texture to your bookmark by using a combination of yarn types, such as a fuzzy or metallic yarn.
With just a few simple steps and some colorful yarn, you can create a charming and functional pom pom bookmark that will add a personal touch to your reading experience. It’s also a great way to use up some of your yarn scraps and is a perfect gift idea for any book lover who enjoys handmade items.
Conclusion
Bookmarks are an essential tool for any avid reader, and making your own can be a fun and rewarding project. With these 10 bookmark ideas, you can create unique and personalized bookmarks that not only mark your page but also add a touch of creativity to your reading experience. Whether you prefer a simple ribbon bookmark or a more elaborate tassel or leather bookmark, there’s something for everyone to try. So grab some materials and let your imagination run wild, and create a bookmark that reflects your personality and love of reading. Happy crafting and happy reading!
Looking for a unique and thoughtful way to showcase your brand or express your personal style? Our custom bookmark printing service is the perfect solution! With a wide range of bookmark types and customization options available, we can create the perfect bookmark for any occasion. Whether you’re looking to promote your business, celebrate a special event, or simply add a personal touch to your reading experience, our custom bookmarks are the perfect way to do it.
Our bookmarks are not only functional but also serve as a lasting and memorable promotional tool. By adding your logo, message, or design to our high-quality bookmarks, you’ll leave a lasting impression on your customers, clients, or friends and family. And with our team of skilled professionals working closely with you, we’ll ensure that your custom bookmark is exactly what you envisioned.
So why settle for a generic bookmark when you can have a custom-made one that truly represents you or your brand? Order your custom bookmark today and start showcasing your style and creativity with every page turn.


Comment (1)
I am extremely inspired with your writing abilities as neatly as with the layout for your blog. Is this a paid topic or did you modify it your self? Either way keep up the excellent quality writing, it’s rare to see a great blog like this one today. !